AWS Cognito User Pools
2023/08/10 5:57PM
Description
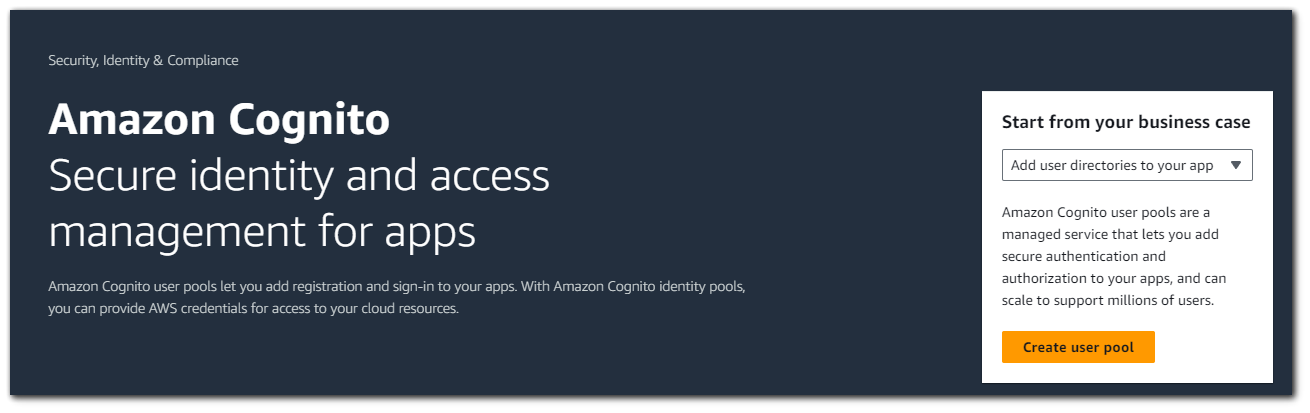
Amazon Cognito user pools are a managed service that lets you add secure authentication and authorization to your apps, and can scale to support millions of users.
Step 1: Getting Started
We have the option between choosing to create a "User Pool" or an "Identity Provider". This blog post will be long enough, so we will just be doing the "User Pool" option.
Step 1: Creating a User Pool
The first step in setting up AWS Cognito is selecting a provider type. We have already selected that we are using Cognito user pool (username/email/phone-number and password sign-in/signup), but we also have the option to select to use Federated Identity Providers as well.
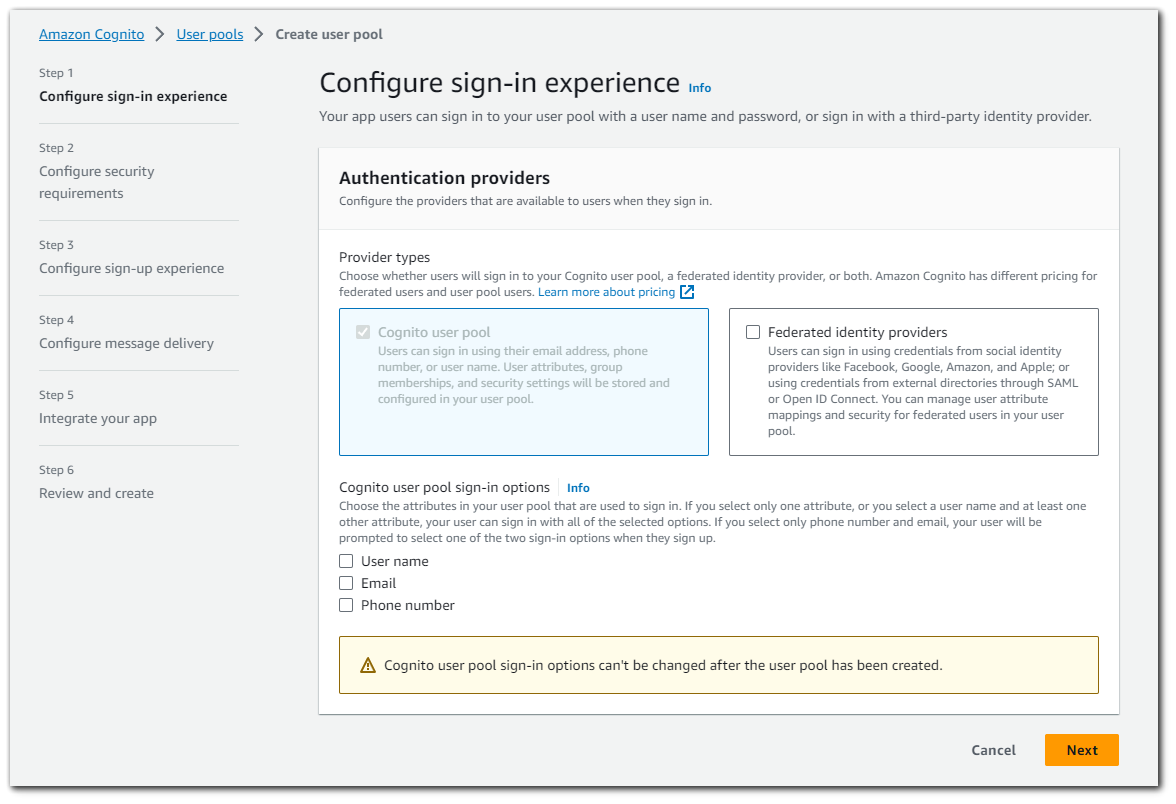
A Federated Identity Provider is what allows use to integrate OAuth2.0 in our application. This is the functionality you see with "Sign in with Google".
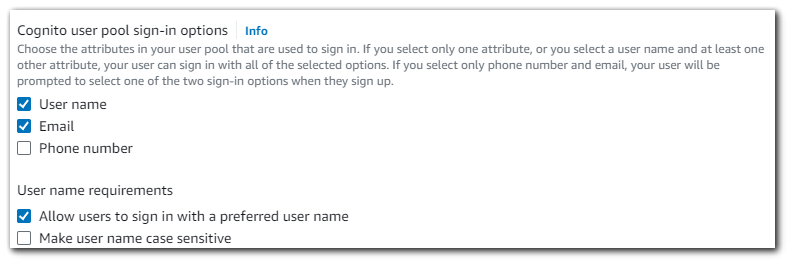
User Pool Options
You can configure Amazon Cognito so that users can sign in with their email address, phone number, or user name. If you enable sign-in with a user name, you can set a "preferred user name" attribute (preferred_username) that works as an alternate value for the user name attribute (username). Attributes that users can use to sign in are known as aliases.
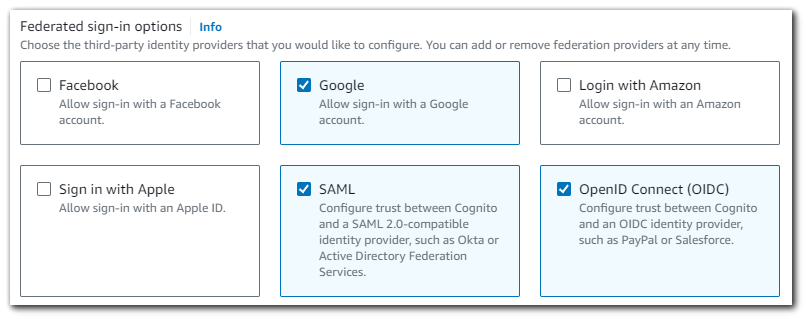
Federated Identity Provider Options
Amazon Cognito supports OAuth 2.0 integration with Google, Facebook, Login with Amazon, and Sign in with Apple. You can also integrate other identity providers that support OIDC or SAML 2.0.
Step 3: Configuring Security Requirements
In this step we will setup a strong password requirement in addition to multi-factor authentication to protect your application users.
Password Policy
Amazon Cognito comes with a default password policy that ensures your users maintain a password with a minimum length and complexity.
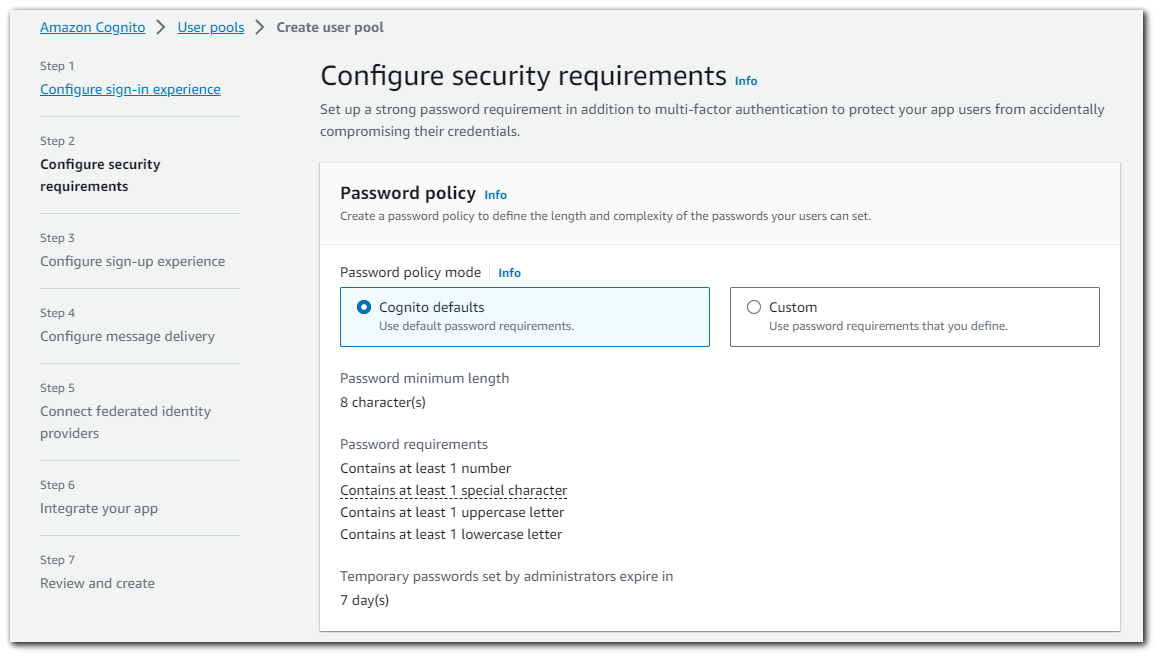
Custom Password Policy
You can also customize the password policy to require a number, a special character, an uppercase character, a lowercase character, or any combination of these. You can also change the default minimum password length, though you can't set this to fewer than 6 characters.

When you perform a password reset, a temporary password is generated and sent to the user. You can change the duration before this temporary password expires so that access with a temporary password does not become a potential vulnerability. Password policy only applies to users that sign in to your user pool. Manage password policy for federated users at the federated identity provider.
Multi-factor Authentication
With multi-factor authentication (MFA), you can prompt your users to provide a second factor when they sign in, either as a code that your user pool sends by SMS message, or as a code that an authenticator app generates. When you choose to activate MFA for your user pool, Amazon Cognito can prompt each new user to set up MFA, or you can manage user choices in your app.
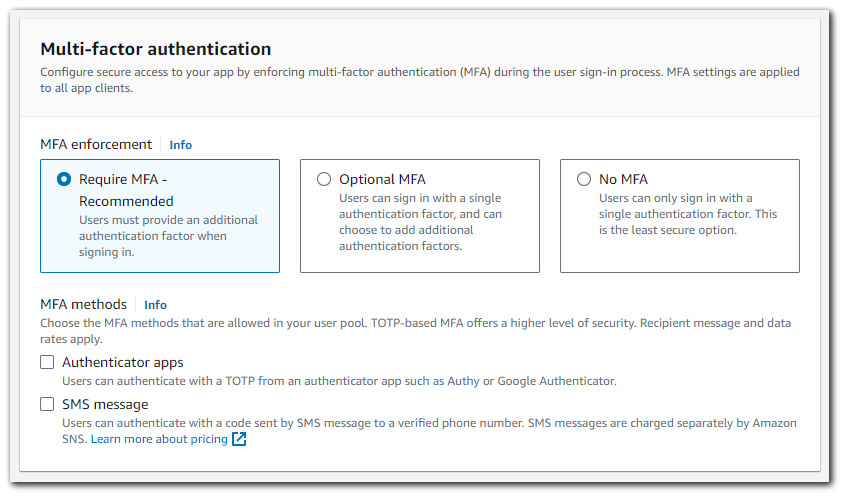
I will select to have MFA as required and Authenticator Apps as the MFA method in my application.
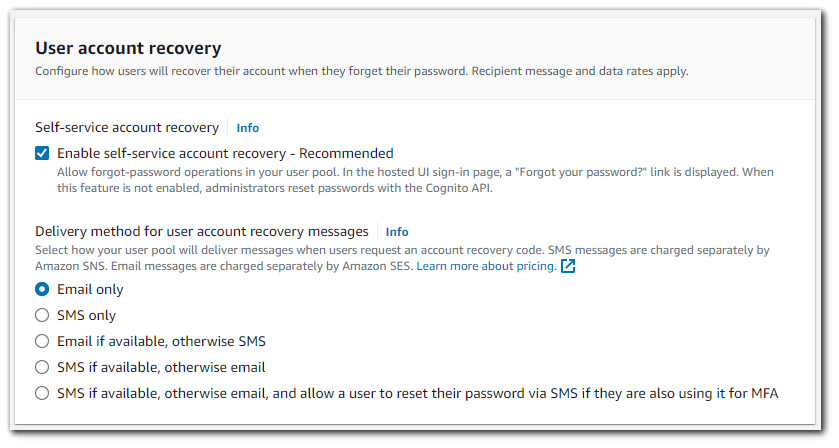
User Account Recovery
You can choose whether users can reset their own passwords.
Step 4: Configure Sign-up Experience
In this step we will determine how new users will verify their identities when signing up and which attributes should be required or optional during the user sign-up flow.

Self-service sign-up
You can choose to enable anyone with access to your public sign-up endpoints to create an account in your user pool. Selecting "Enable self-registration" adds a "Sign up" link to the sign-in page in the hosted UI.
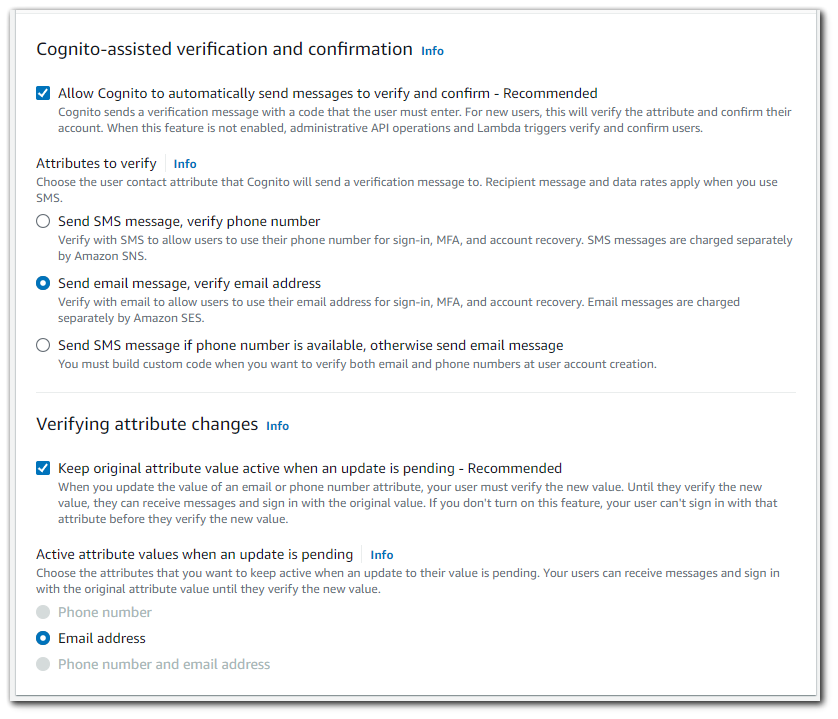
Cognito-assisted verification and confirmation
By default, Amazon Cognito automatically sends messages to new users to verify their accounts. These messages are sent to the email address or phone number the user provides during sign-up. New users must verify their email address or phone number before they can sign in to your user pool. Users created by the administrator are also sent verification messages. This process helps prevent the fraudulent creation of accounts in your user pool.
Required attributes
Amazon Cognito uses a list of standard attributes taken from the OpenID Connect (OIDC) standard. You can make a subset of them required when users sign up. As an alternative to setting required attributes, you can use your own application code to ensure that the attributes you need are captured.
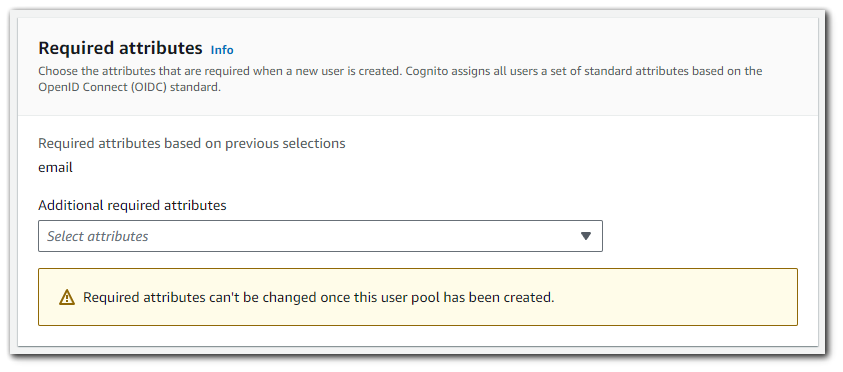
Additional default attributes are:
- address
- birthdate
- family_name
- gender
- given_name
- locale
- middle_name
- name
- nickname
- phone_number
- picture
- preferred_username
- profile
- updated_at
- website
- zoneinfo
Step 5: Configure Message Delivery
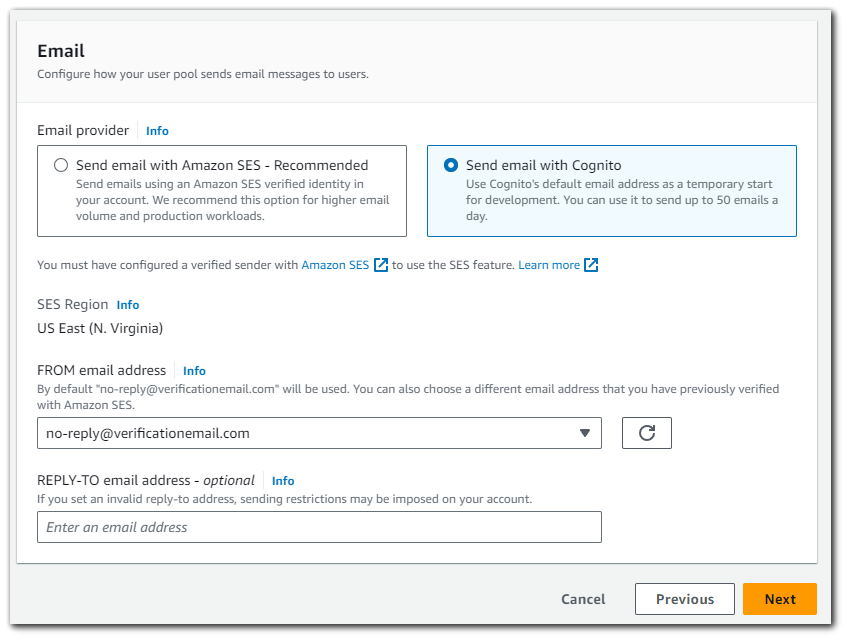
Amazon Cognito sends messages to your users for sign-up, sign-in, MFA, and account recovery workflows. In this step, you will configure the email and SMS settings that will integrate Amazon Cognito messages with your AWS account. For production levels of message delivery, Amazon SES and Amazon SNS, which are integrated with Amazon Cognito, will add cost to your bill.
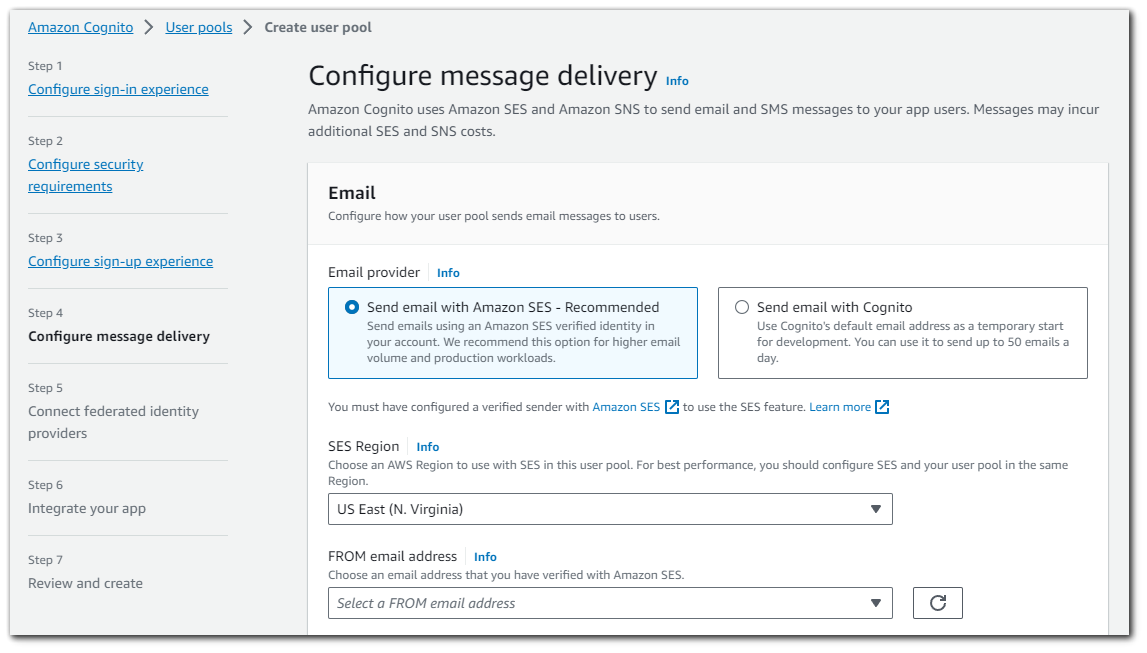
In order to use the SES option, we will need to configure a verified sender with Amazon SES. I don't want to do that right now, do I will choose "Send email with `Cognito`". Choosing "Send email with `Cognito`" is a typically used in development as it will only allow you to send 50 emails a day.
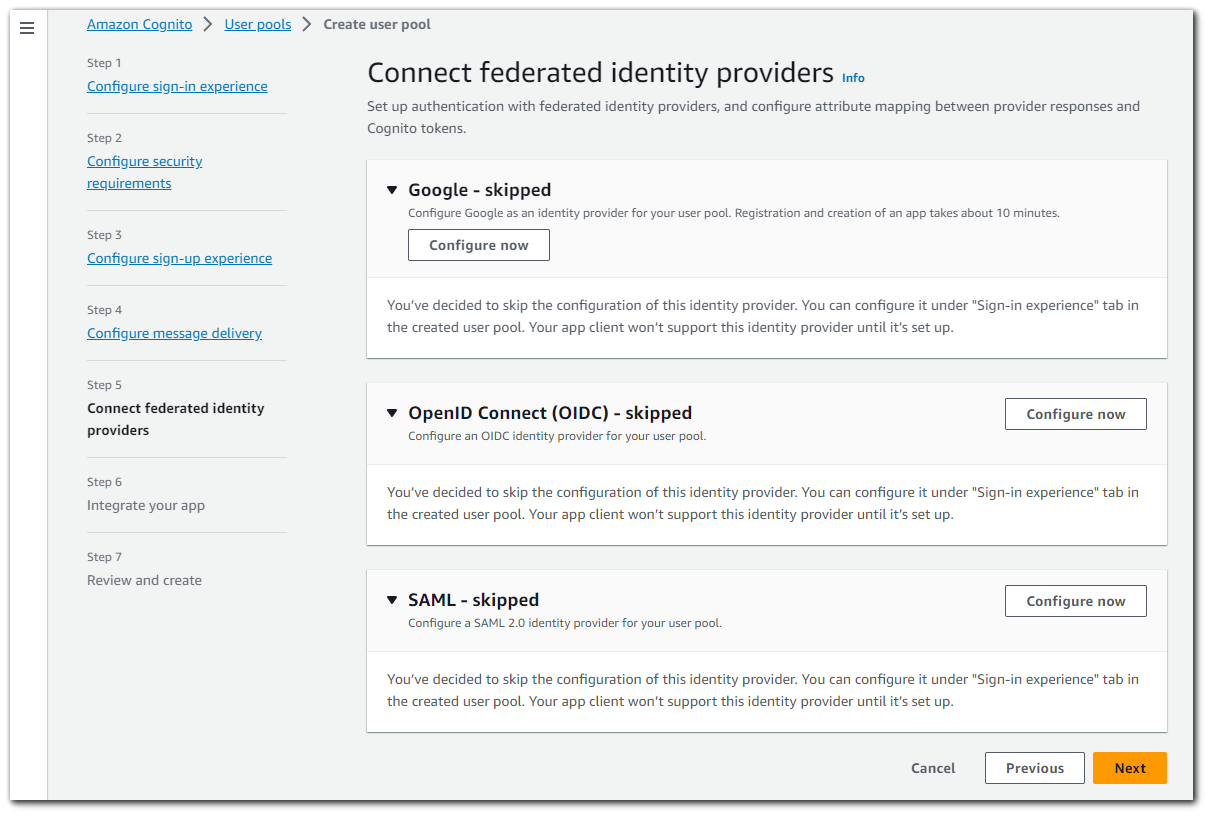
Step 6: Connect Federated Identity Providers
An Amazon Cognito user pool can be a user directory, authentication front-end, and OAuth 2.0 server for your app. In this step, you will create an app client to connect your app to the user pool and authorize Amazon Cognito to generate OAuth 2.0 tokens.
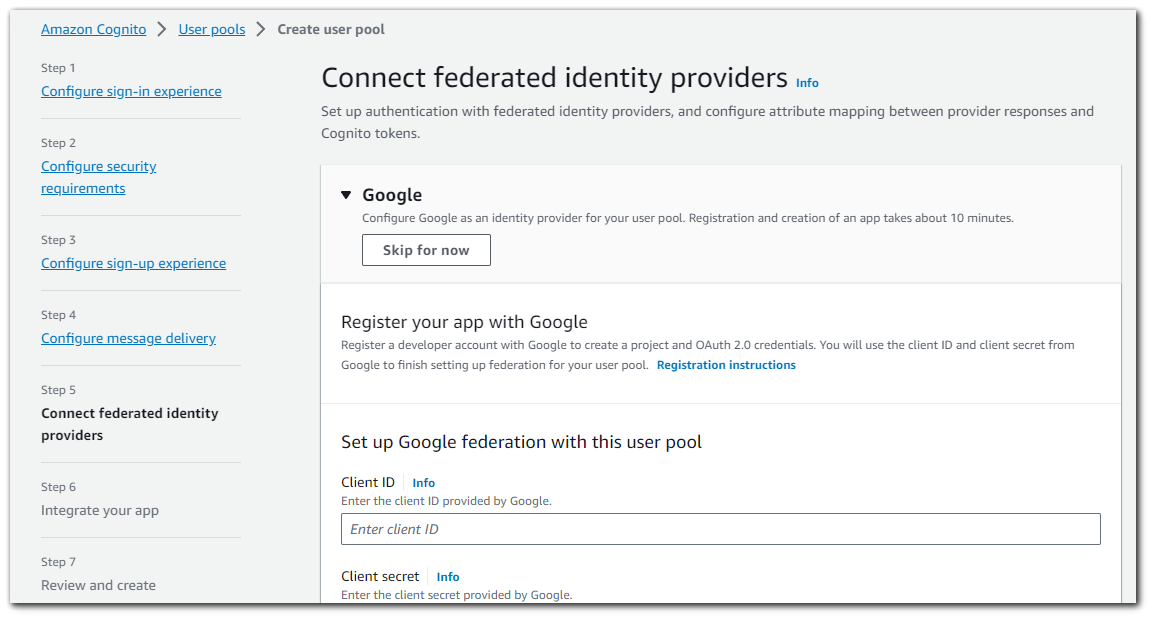
I will save how the OAuth2.0 setup for another blog post as this will already be quite long. There is an option to skip the signup.
Step 7: Integrate your app
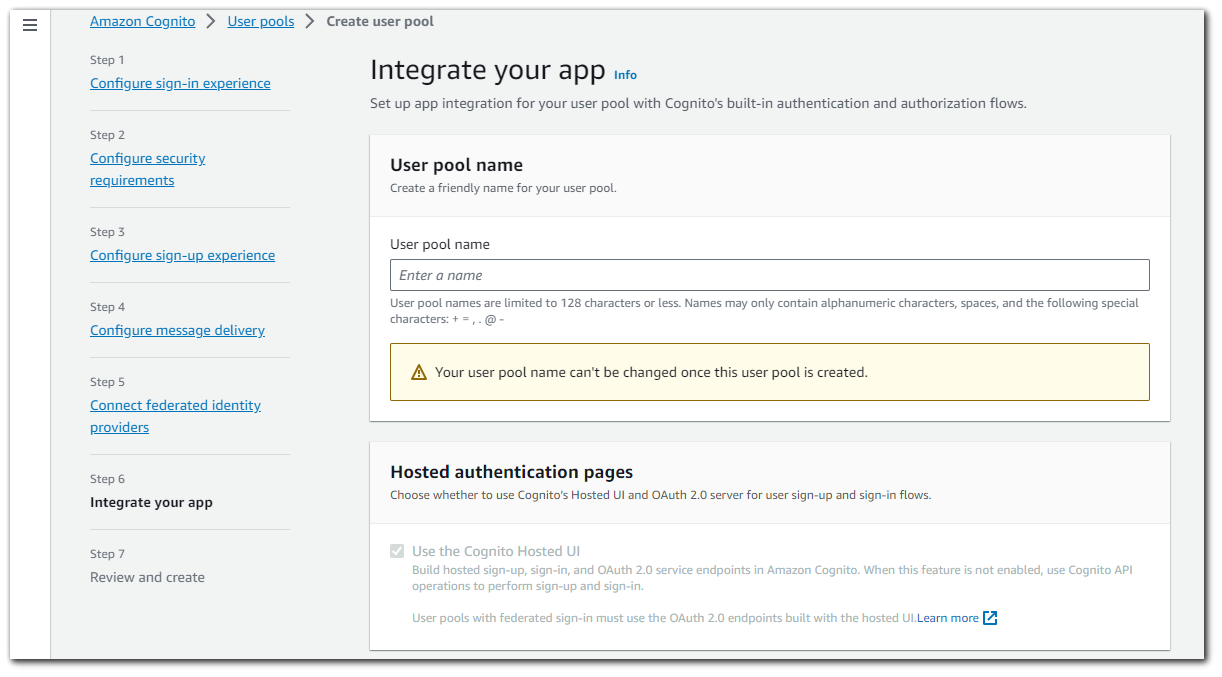
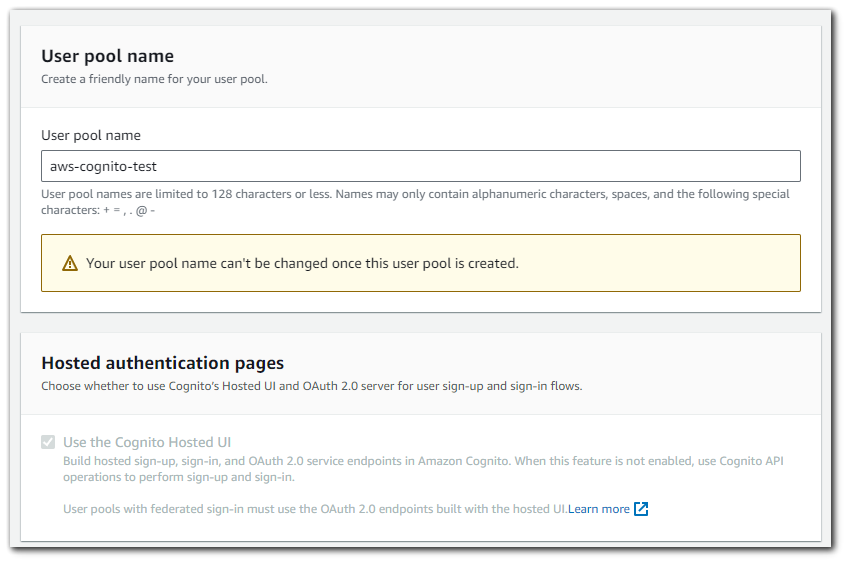
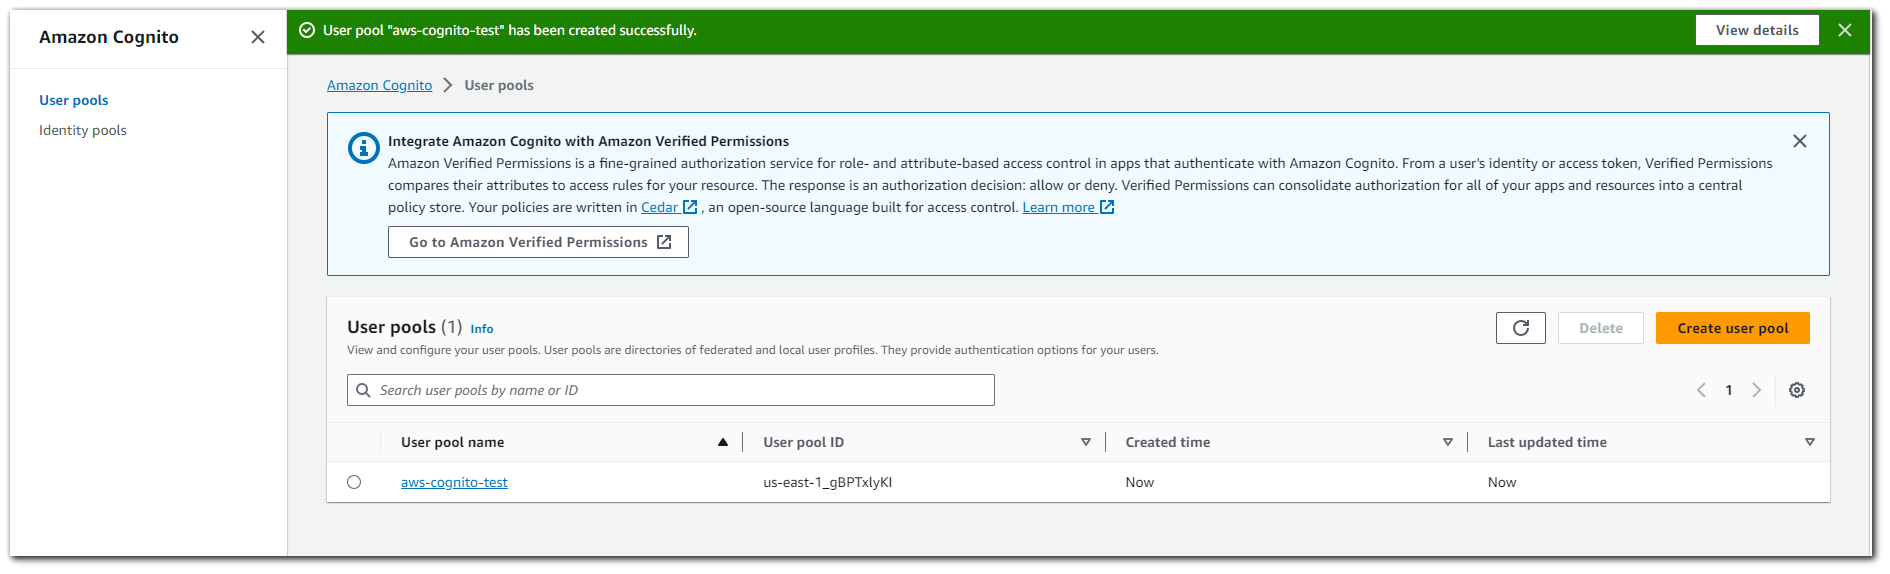
For the User pool name, I chose `aws-cognito-test`. There is also a mandatory selection box for hosted authentication pages. Your web and mobile app users can sign in through social identity providers (IdP) like Facebook, Google, Amazon, and Apple. With the built-in hosted web UI, Amazon Cognito provides token handling and management for all authenticated users. This way, your backend systems can standardize on one set of user pool tokens. You must enable the hosted UI to integrate with supported social identity providers. When Amazon Cognito builds your hosted UI, it creates OAuth 2.0 endpoints that Amazon Cognito and your OIDC and social IdPs use to exchange information.
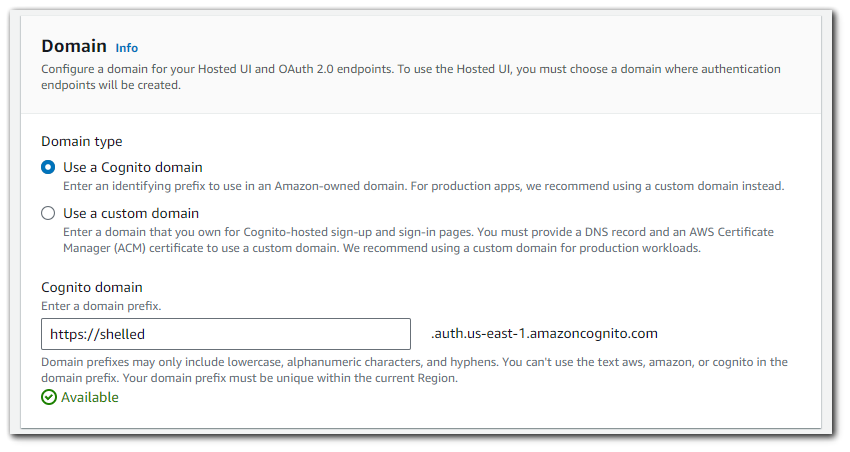
Domain
Each user pool and each app client in Amazon Cognito can use a customized domain, either Amazon-owned or your own. When you choose a domain and configure the hosted UI to use it, you will have access to web pages for user pool sign-up and sign-in, as well as the endpoints required for OAuth 2.0.
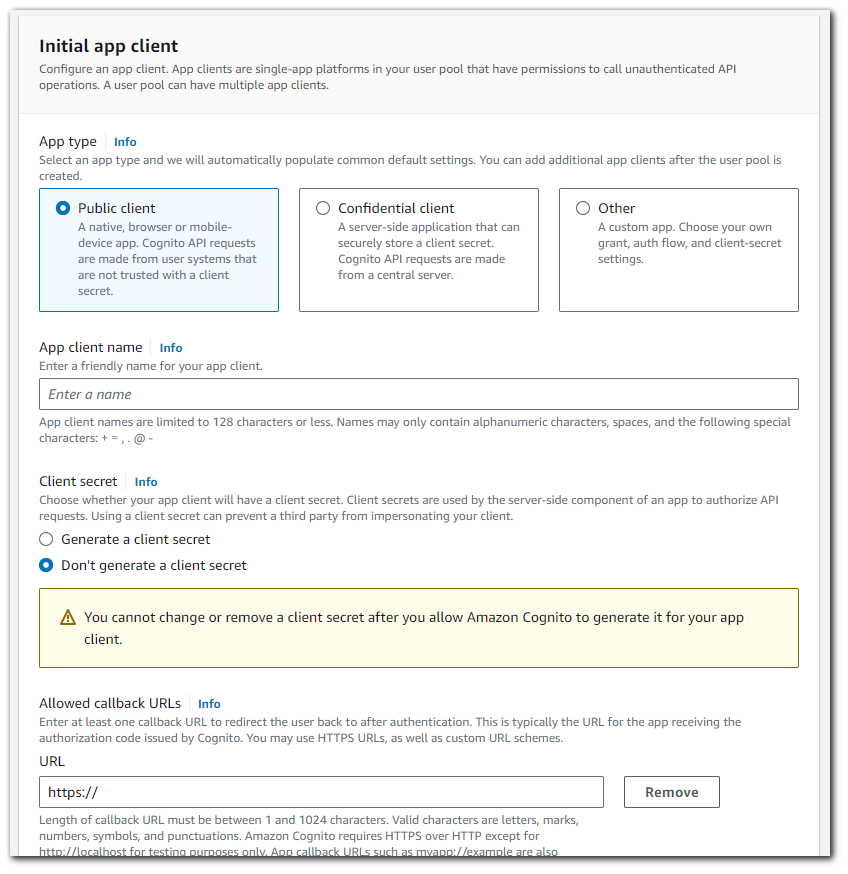
Initial App Client
The OAuth 2.0 standard defines two client types: public and confidential clients. The best settings for your app client depend on the type of app you build. You can choose the default settings for a public or confidential client. You can also select Other and chose settings that meet your requirements. I will choose the default settings for the Public client.
Step 8: Review
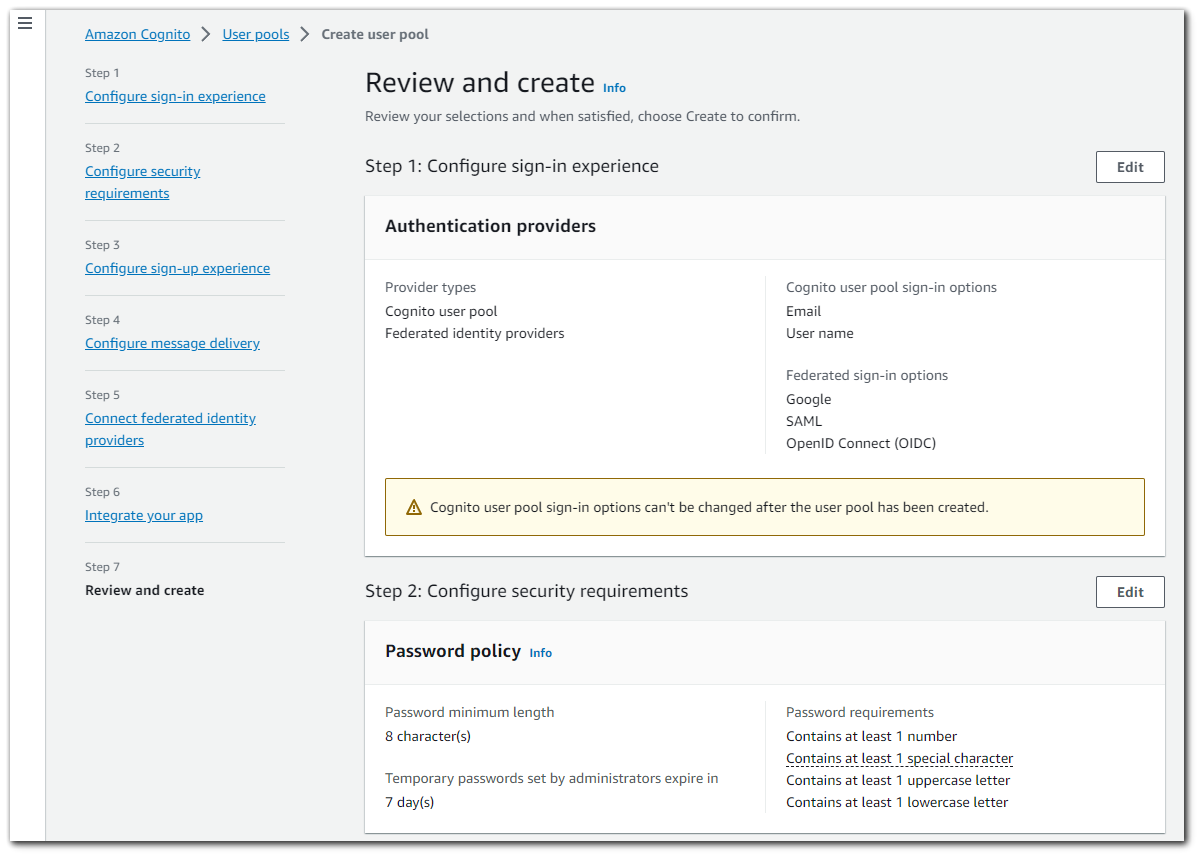
User Pool is now configured.
Step 9: Hosted UI
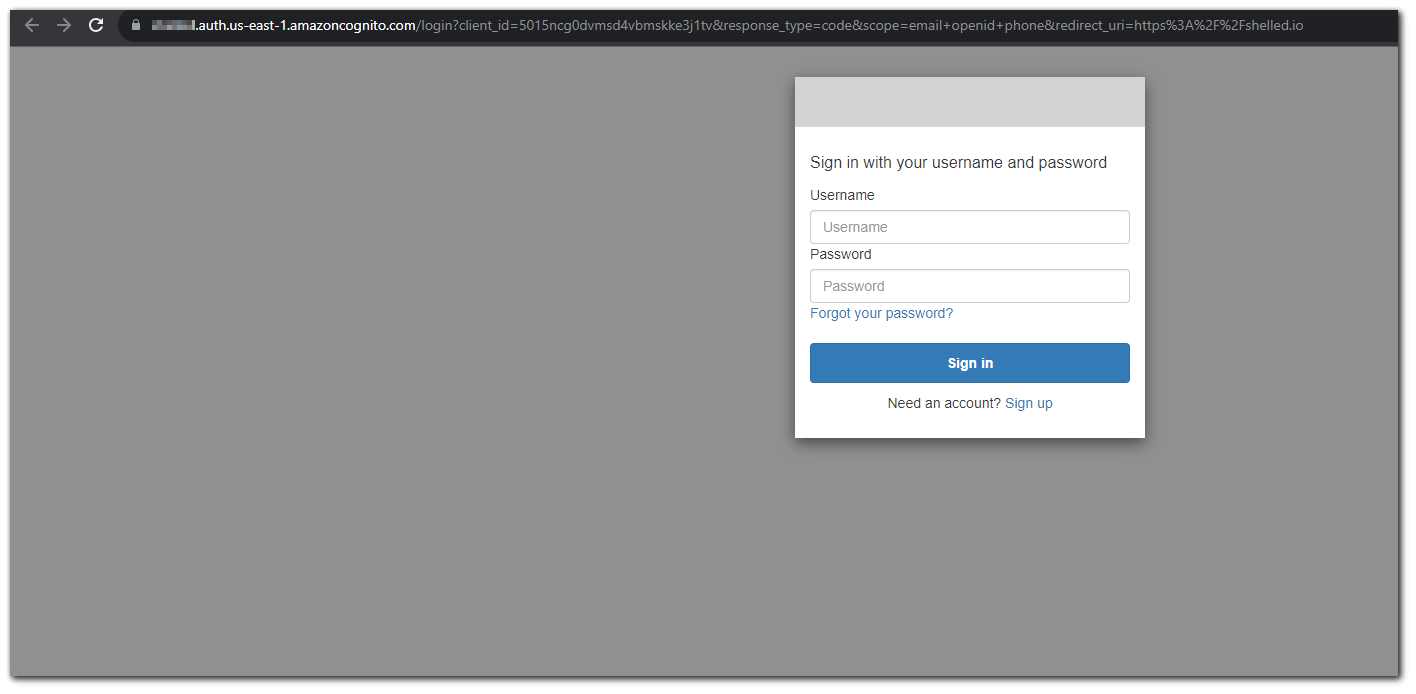
This part was a little confusing to figure out. When AWS cognito is created, I wanted to go to the website that has the sign in feature. When going to the created website https://WEBSITE.auth.us-east-1.amazoncognito.com, I got just a blank page.
The issue was that I was missing parameters when trying to view the UI. This wasn't explained anywhere after setting up cognito. https://stackoverflow.com/questions/49569256/empty-page-for-the-sign-up-and-sign-in-pages-hosted-by-aws-cognito.
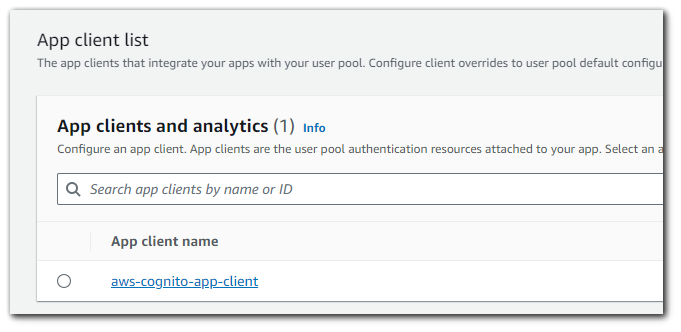
By going to Amazon Cognito > User pools > YOUR_USER_POOL_NAME > App integration > scroll to the bottom and select you App client name.
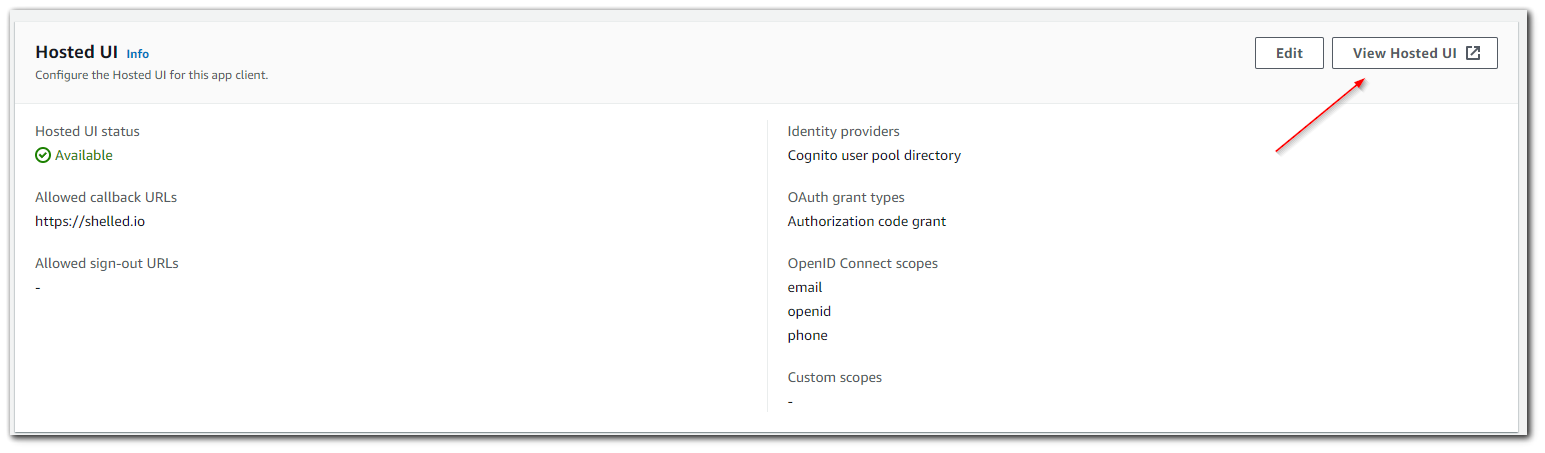
From here you can select the `View Hosted UI` option to view your website.
TADA!
Step 9: Register a User
Now that we have Cognito setup, lets register a user. Click on sign up and fill in the form.
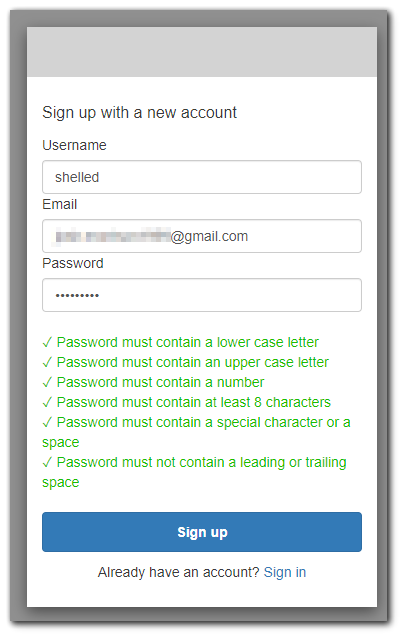
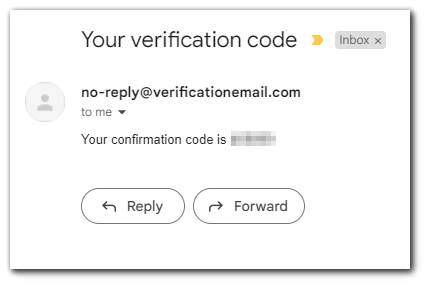
After filling out the form, I got the following to verify my email address.

In my email, I got a message from `no-reply@verificationemail.com` with a code. Remember back in Step 5: Configure Message Delivery I set the option for email delivery to be from AWS cognito (limiting us to 50 emails per day). This is the email that will send the code by default.
MFA
After verify my email with the code I get an MFA prompt. Remember back in Step 3: Configuring Security Requirements, I configured MFA to be required.
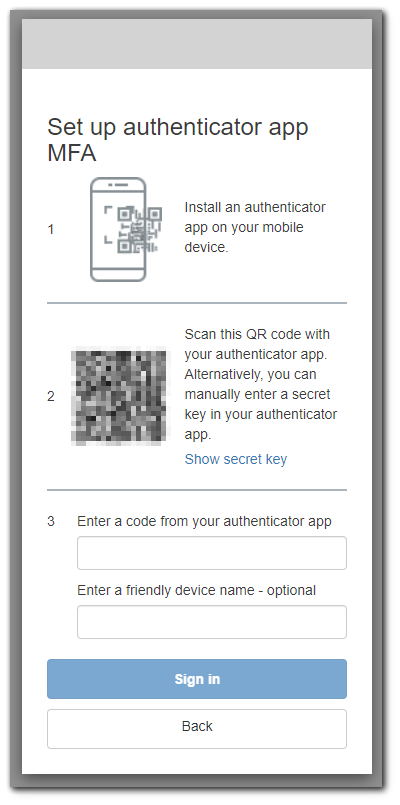
I will use Duo on my mobile device to setup MFA. With all this done, I am sent back to the sign in screen. So lets sign in.
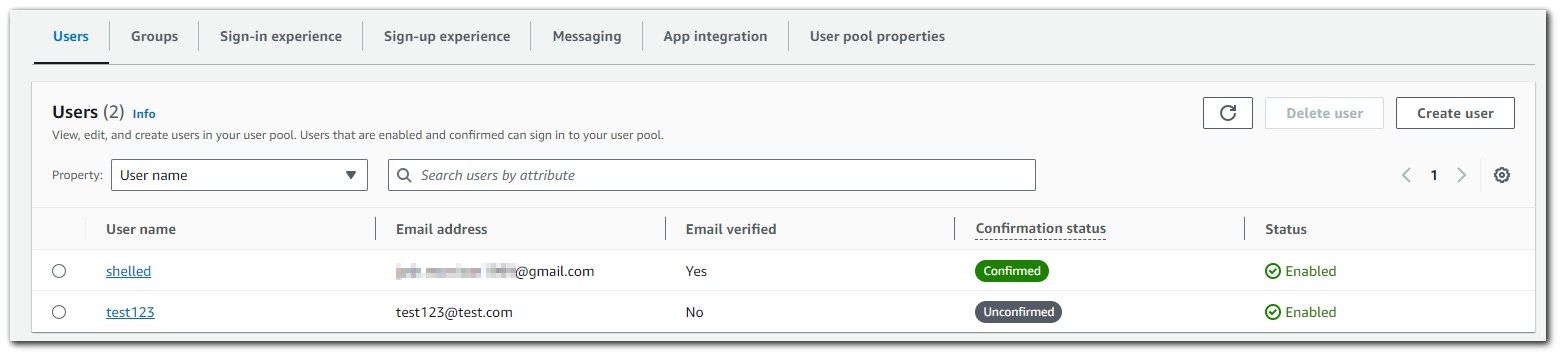
Step 10: Cognito Dashboard Management
After registering my account, I can view in the Cognito dashboard that my account is successfully registered with a verified email address.
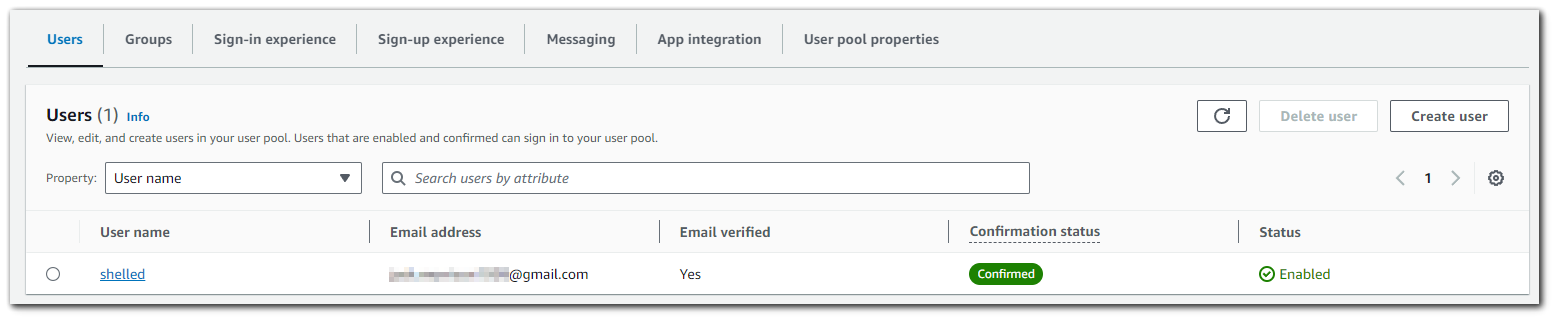
I will register another user with a random email address, and as you can see the Email Verified is set to "No" with a Confirmation status of "Unconfirmed".